Pages

GO TO YOUR ROOM !

I borrowed this phrase from the recently deceased Canadian painter Robert Genn who believed that there is only so much we can learn about how to paint from the many fine instructors and resources available today. The true learning comes from going off on our own and just doing it - Go to your room!

I have had the good fortune to take instruction from outstanding artists in Canada and the USA. I continue to work on my own development ( Going to MY room!) . I share, through this blog and workshops, what I have learned and what others have shared with me.

I created this blog primarily for those attending my workshops to keep in touch and to further share as we grow together. If others are interested in following that would be great.

Enjoy the journey.

Saturday, 16 June 2012

MAKING A START - ACRYLIC PLEIN AIR

In the last two posts  I have shown my existing set up for plein air in acrylics. 


Now make the starts - I say making a start because that is the mind set I need to have. From experience I know that the chance of making a finished painting on location is slim; the chance of making something ( a start) that, with  thoughtful reflection and freeing yourself from the limitations of the reference, there is a good chance you can make a painting that will stand on its own - be both interesting and one that will read ( represent what you are wanting it to represent). Those finishes can be made at home under controlled conditions or often in my case from my RV. I rarely use reference photos - but  just use my imagination helped by a lot of plein air to make the finishes that satisfy me.  


And that is the trick for me - going far enough with the piece to capture the shapes and value pattern that the location suggests but not so far that I am committed to details or have gone to the point of not being able to save the work .  I would far rather start two or three paintings and take them only to the point that I need to think carefully before I overwork them, than to make one finished painting on site  that is generally not as strong as any of the three starts would be once I carefully consider my next moves for them. 


My acrylic plein airs are generally larger than my oil starts - 11x14, 12x16 and 14x18. I work on 1/8 door skin - with gessoed linen or canvas mounted .  I either start with a toned canvas or tone it once I select my subject. 


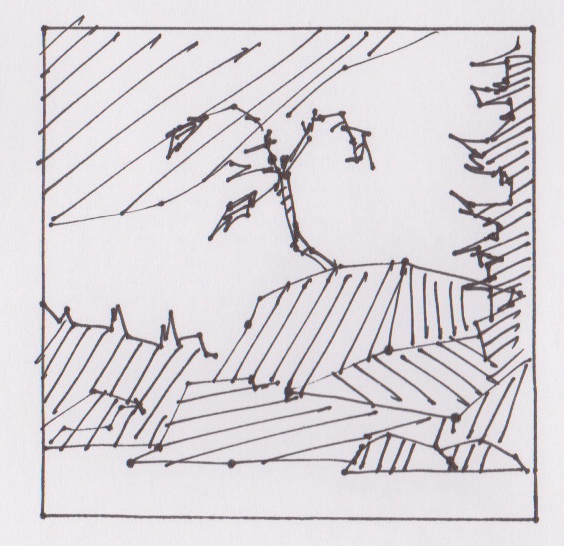
I select my subject fairly carefully - one of the best pieces of advise I got was from Robert Watts in San Diego - when painting on location always pick a battle you can win - or one that you can turn into a battle you can win (last part mine).  I always make one or more thumbnail sketches ( as described earlier) identifying the shapes to be included ( having decided what to exclude) and placing each in one of three values. I transfer the rough sketch to the canvas with water soluble colour pencil. I then make the final sketch with either graphite pencil, china marker or black marker ( Sharpie) depending on the subject. 


Then I get to it. Sometimes I apply a dark transparent over the canvas and use my shaper to create a three value pattern ( see earlier posts) then go from there. Other times I block in my darks using transparents and go from there. 


Did a couple of days of plein air from our RV. These are some of the first acrylic plein airs I have done this season - so I started with a very simple subject - light hitting the snow on a mountain peak.


Notice the neutral value and colour of the linen with clear gesso- pencil sketch 

Prussian Blue Golden Liquid and medium

Shaper used to create value pattern - got to move fast

Not sure what to do next? ? that means that is far enough
So that is enough. Total time about 45 minutes. Set it aside to consider further and start another one. 


Next, pulled my cart to the boats and started again. In this case I did my pencil sketch and then outlined the important lines lightly with the Sharpie. Then I played with a mix of warm colour to create a warm underpainting, then got at the opaques to "carve" the shapes. 


Set them up as a group, glass of wine and consider each. I always carry a mix of frames. Tried the first in a smaller, horizontal format frame and liked it better -need a cut down at home. 


Try the 11x14 in a 8x12 frame - simple subject and like it better
Might be enough to make it a finished sketch 


Next day, new location. First off the back of my pick up. Two starts of the same scene. Draw one, put on the underpainting glaze and shape the values. Its 6 AM and the paint is drying slowly so while the first is drying make the second sketch and using a different transparent glaze shape its value pattern.


Later that day a few more. 


Stop, set it away from the reference and consider 

A few changes made, then frame on site and consider more. Then take  home to decide if it could become a painting.
So two days on the road. Took home 8 acrylic starts and did 6 small oils ( thats another story).  Now I will spend time considering each for changes and deciding if any could become a painting. 
My (our) living room for a week or so after a plein air trip. 


PLEIN AIR USING ACRYLICS - A FEW EXAMPLES

Painting plein air using acrylics poses different challenges than working plein air in oils. Most of it has to do with the fast drying time of acrylics. There are a number of ways to manage or delay the drying time and there are the new slow drying acrylics (Golden Open) that some artists seem happy with. The acrylic plein air painters that I have worked with use the fast drying time to their advantage and have developed systems to manage it. I have worked with Golden Open enough to know I much prefer the "regular" acrylics.

What most acrylic plein air painters have in common:


  • They do not work with a limited palette - as most oil plein air painters do and recommend. Most use a full palette of warm and cools and a good selection of convenience colours - those that are useful right out of the tube. It is difficult return to a mixed colour - because of the fast drying time and the fact that acrylics dry darker - so many keep a variety of colours that are part way along the mixing chain that they can just grab and use with confidence. I mix a lot of my own colours ( eg. common colours used for skys) and have them in convenient squeeze bottles. 
  • They use paint with a variety of viscosity- because acrylics dry through evaporation paints with high water content stay active longer
  • most use a  Sta Wet pallete and learn to control the water content of the paint
  • many add a retarder to the paints
  • all have a handy sprayer to keep the paint moist
  • most use a good umbrella system that keeps the sun off the paint and palette


Two example of acrylic plein air painters that work in the hot southern US:


  • Kathleen Elsey - took a workshop in Taos NM. She uses the large Shade Buddy umbrella and 12x16 Sta Wet palette. She squeezes out her paints then squeezes a retarder onto each pile of paint - in the heat it slowly softens to cover the paint. Too much retarder makes it " slippery" to work with (similar to the feeling I get working with Golden Open)  but the right amount is not noticed. She is a Fauvist painter - lots of colours - but that is not the reason she puts out the selection she does - its how one works with acrylics in a dry and hot environment. 
Kathleen using a 12x16 StaWet on a Soltek easel and Shade Buddy umbrella

Each pile of colour has a retarder added at the beginning 


  • Marcia Burtt in southern California uses a fishing tackle box with multiple "compartments" filled with paint - probably more than 20 colours. There is a lot of paint and she keeps it moist  and just draws from the tackle box as needed. Like me she does not put out her palette -  but picks up colours  as needed. She is one of the few acrylic painters invited into the big plein air competitions in the US.  Marcia has released a new DVD working with acrylic plein air. 
Marcia at the Laguna Beach Paint out 2007

Fishing tackle box - opens up with two layers of paint

There are of course many other great acrylic plein air painters - each with their own systems. I use the two examples because they work in the "heat" successfully - demonstrating that the fast drying issue can be managed and used to advantage.

My guess is that there are more really good acrylic painters that also known for their acrylic plein air in British Columbia than any region of Canada or the US: Robert Genn, Mike Svob, Brent Heighton, Marilyn Timms,  Mark Hobson - and many more. Each gives great workshops.

Next blog - working though some plein air acrylic examples. 

Wednesday, 13 June 2012

Acrylic Plein Air - my set up

I have been doing plein air using acrylic paints for about 6 years. I have  worked with a number of different plein air systems and have taken workshops from some excellent acrylic plein air painters. The system I use today is a mix of the combined wisdom of those artists with what has worked best for the type of work I like to do - and after years of trial and error with those systems. The system I like best  mimics my acrylic studio  as much as is practical for working in the field. 


If you have been following my blog you will know that when painting with acrylics I like to work in the three different viscosities of paint: Golden liquid ( very thin), Liquatex Soft Body (medium viscosity) and any tube paint ( heavy viscosity) depending on the stage of the painting. I use two palettes: the StayWet palette to hold the heavy viscosity paint and a glass mixing palette onto which I put the heavy for mixing and to which I add as needed the mid and thin liquid paints. The glass is also where I mix glazing medium with transparent paint for glazing. 


So this is my set up: a system that includes a small Sta Wet and a glass mixing palette. I need  my liquid paints at hand so I can squirt out small amounts as needed. Hanging from the front are two containers of water - one clean and one to hold dirty brushes. I can work on panels up to 16x20 -  but generally work 11x14, 12x16 and 18x24.  So those are the ingredients of a working acrylic system FOR ME. 


Following those " essentials" I have made acrylic systems using a Judson Gorilla 12x16, the Soltek ( using glass set into the Sta Wet box) and an 11x14 Easy L.  But below is my favorite so far. It is the Alla Prima Pochade Yellowstone 11x14.  Below is what it looks like new and after a few  years. 


The top has storage for wet panels (when using oils) but I use it to store brushes a straight edge and my window scraper (cleaning my glass palette).  My brushes I store in a Judson Brush Holder ( is flat so fits into the top) and hangs on the drawer.  I can carry extra brushes, a rubber shaper and other thin objects on the glass panel when not in use.


The Sta Wet Handy Palette rests on the drawer and is held by a clamp ( in case of winds etc). I cut a small area of the top to allow the top to be on the palette with the clamp in place when I want the Sta Wet covered. 


When working plein air in acrylics I take along a lot of "junk" : medium, extra water, paper towels, sprayers, large panels, etc etc. As a result, with acrylics I generally work fairly close to my vehicle and use a portable carrier system that doubles as a work table. I have attached two recycle containers to a folding transporter. Inside is a large piece of heavy plastic that can rest on the top to make a "table" surface.

Then there is the umbrella - essential for a variety of reasons - particularly important for acrylics to keep the sun off and prevent drying. I have three different umbrellas : an Easy L, a Best Brella and a Shade  Buddy. The Shade Buddy is great. It it large, folds at the mid point and has a spike end you can drive in the ground. It covers me at over 6 ft tall. But best for me,  I have put a receiver for it in the transport system so I can use it as a part of my system and move it as required by the changing sun and can use it on pavement, sand or soil. 

With my 12x16 Gorilla Box 

Every body has an opinion


The smaller folding umbrellas can attach to the carrier and be free of the Alla Prima Pochade and can move to follow the sun. 


Finally, an "essential"  piece of equipment for plein air on Vancouver Island .


with my oil system


Next post I will describe my approach to an acrylic start using this system.

Cheers. 


Sunday, 20 May 2012

WORKSHOP - Whistler Out of Bounds Artists


Just finished a workshop with a group of energized and accomplished artists in Whistler - The Whistler Out of Bounds Artists. 


What fun! It was held in one of the organizer's garage and worked well. Some started by 7 AM and continued until 9 PM. While it was not a "live in workshop" the extended hours gave us the opportunity to really get to know one another and the fact that the group were all friends and paint together gave them the confidence to relax, explore new approaches, and experiment. The energy in the room was contagious. Certainly the most fun and rewarding of any of my workshops so far- and once again,  I probably came away having learned more from my "students" than they did from me. 


The "demo starts " made during the workshop. Two small oils and four larger acrylic. Need now to see if I can turn them into "paintings". 


Interesting to me was that, in spite of the fact that they were all advanced learners of the craft of painting,  many told me that they identified with my attempt to clarify the stages of development of the artist and my attempt to show that many developing artists, although advanced in some areas are less advanced in others and that it would help if they could  identify and isolate  their weak areas and focus their learning. 


Coming from a science background in learning and teaching at the university level  I found learning to paint very frustrating. Organizing it into learning streams  helped me and I think would help others.  I am in the process of creating a syllabus, or "learning to paint curriculum", with specific learning goals for developing artists that I hope will make the learning needs  clearer. 


Below are a few of the slides used for that discussion:


Stages most artists go through as they progress.  Learning to paint is a big "head game" and knowing where you are in the journey can help. 


A few learning streams. Trying to position your learning in  each may help to identify topics that need  attention. 


A few comments from the workshop:

" ... can’t tell you how much I enjoyed the week.  I’m feeling very inspired. 

" You have incredible energy, generosity and kindness in your teaching."

"  As a former teacher, I can say with authority that you're a very exceptional teacher"

"  We all agree that was likely the best workshop we've ever had. It will take some time to assimilate and incorporate but we had SO much learning. It was perfect for our group.. loads of practical and technical information as well as constant repetition of fundamentals. And you were so willing to work hard with each one of us. 

" You are a superb fun teacher .. "


Saturday, 12 May 2012

Too dumb to say no!

A friend asked me to do a portrait of his deceased father. I was pleased to be asked and so said OK. He brought me a 2x3 black and white taken in the 1940s.  Wow, I said - that will be a bit of a challenge - trying to work my way out of the commitment. Then he said, but I would like it done in colour - as a gift for my daughter - her grandfather.  It got a bit emotional so I said it would be a fun thing to "play with" - no promises as to outcome.

So I have made two 9x12  sketches so far. The first is a burnt umber pick-out, finished adding titanium white and warming it using transparent red iron oxide then added some dark accents with ultramarine blue - all water soluble oils. The plan was to make the under-painting value sketch then gently add colour once the first was dry. It was done on Yes Canvas. If you have not tried it Yes Canvas is an all- medium canvas that I was encourage to try while studying at Watts Atelier - for fine portrait work. It is inexpensive and very fine weave suitable for portraiture. I purchase in panels and in rolls mounting on board. U tube video on Yes Canvas   Because this canvas is so smooth, the burnt umber picks out nicely to create the value pattern - using paper towels, wet brushes and Q tips.


The second sketch was done in colour and a bold brush application, thick and juicy. Drawing looks a more like Tom Selleck - and the colours are probably too young for his stage of life.

Fun exercise to try. Let these dry for the week then play some more.

Off to Whistler to do a workshop with a really interesting group of artists.

More later.


Friday, 4 May 2012

Stapleton Kearns - GREAT PLEIN AIR ADVISE!


 One of the many blogs I follow is from East Coast artist Stapleton Kearns . He has just posted his sixth in a series on plein air painting. Now there is lots of good stuff  out there on painting and painting plein air- but now and again one really hits home - and this is one of them. I highly recommend reading. Don't know if there are more to come. 


Visit Stapleton Kearns Blog - this is the first of the series. Follow the others up to date.

Wednesday, 2 May 2012

KEEP IT SIMPLE STUPID = KISS


Learning to paint well is hard - damn hard. There are so many "balls to keep in the air" that it is easy to get off track, especially at the early stages of a painting and particularly when learning to paint plein air. Anything we can do to simplify and to remind us of the issues is helpful. I can remember that my first pochade - a Judson Gorilla Box - had a four value scale and a list of things to remember stuck on it beside the panels. 


Having recently finished two workshops (a five day Fundamentals for Landscape Painters and a two day Preparing for Plein air) I am again reminded how hard it is to hold onto the fundamentals and apply them in the heat of battle.  


Lots of painters have little reminders. I have been thinking about one for a few weeks and tried it out in the workshops. It is my 6 Ws. It will probably evolve over the next while but it is a start that may be helpful for others.


These 6Ws are to be used during the planning stages. I encourage recording simple shapes to include in a thumbnail sketch, then organize the shapes into three or four values. I encourage making additional  sketches using the 6Ws below to strengthen the first sketch. Every time you put pencil to paper and consider what to include or exclude and where to place things (WHATSITS) your composition will improve and your painting will move ahead more quickly and with confidence. 


WHAT-WHY-WHERE-WHATSITS-WORDS-WHAMMIES

Know WHAT your painting is about
What is the centre of interest, etc . - the reason you have chosen to make the painting?

Know WHY you are attracted to paint the WHAT
What is it about the WHAT that attracts you? Might be the colour of light on it, the strong value contrasts, etc. Exaggerate the WHY to strengthen the WHAT

Know WHERE on your canvas your WHAT will be best and your composition will be strongest
Understand the guidelines used for placement - generally keeping your WHAT away from the middle of the painting.  

Know the WHATSITS available to help support the WHAT and the WHY
Identify the objects or elements available in the scene that  can be used to strengthen the compositon - clouds, trees, reflections, rocks, etc - that can be relocated, exaggerated , enlarged, etc and generally used as needed. They are all subordinate to the WHAT and can be handled as such but available as required
. 
Choose WORDS to describe the painting - five or less
I have found it helpful to write down below my thumbnail sketches WORDS to describe what the painting is about or why I have painted it. These can be helpful during a self critique to see that you have simplified and that the painting is about what you intended. Can also help with the title. 

Choose the two big  WHAMMIES  - colour and value dominance
The two big eye catchers that create emotional draw to your work are value and colour. Having clear dominance of one value and one colour most often makes for stronger paintings. 

Simple flat two dimensional selection of shapes to include  in composition 

Separate light values  from combined midtone and dark values 

Divide midtones from darks 

Make additional sketches considering the 6Ws to strengthen the composition. If others have KISS systems that work for them, I would love to learn about them..

Cheers.