Pages

GO TO YOUR ROOM !

I borrowed this phrase from the recently deceased Canadian painter Robert Genn who believed that there is only so much we can learn about how to paint from the many fine instructors and resources available today. The true learning comes from going off on our own and just doing it - Go to your room!

I have had the good fortune to take instruction from outstanding artists in Canada and the USA. I continue to work on my own development ( Going to MY room!) . I share, through this blog and workshops, what I have learned and what others have shared with me.

I created this blog primarily for those attending my workshops to keep in touch and to further share as we grow together. If others are interested in following that would be great.

Enjoy the journey.

Thursday 6 November 2014

MORE ON COLOUR SHAPERS


Thick yellow spot laid on then use shaper to draw out edge and lift out to let underpainting through


Wow, had lot of questions about colour shapers: what are they, where do you get them, can I just use my kitchen spreader????

Colour shapers come in a variety of shapes and sizes. They are rubber - and you can buy rigid (generally black rubber)  or more malleable  (generally mid value gray). The come from fine tipped to a blade up to 5 inches.

My most useful are 2 and 3 inches. These will do everything that the pointy ended ones do and so much more. For me the pointy ones are next to useless in comparison and they cost almost as much.

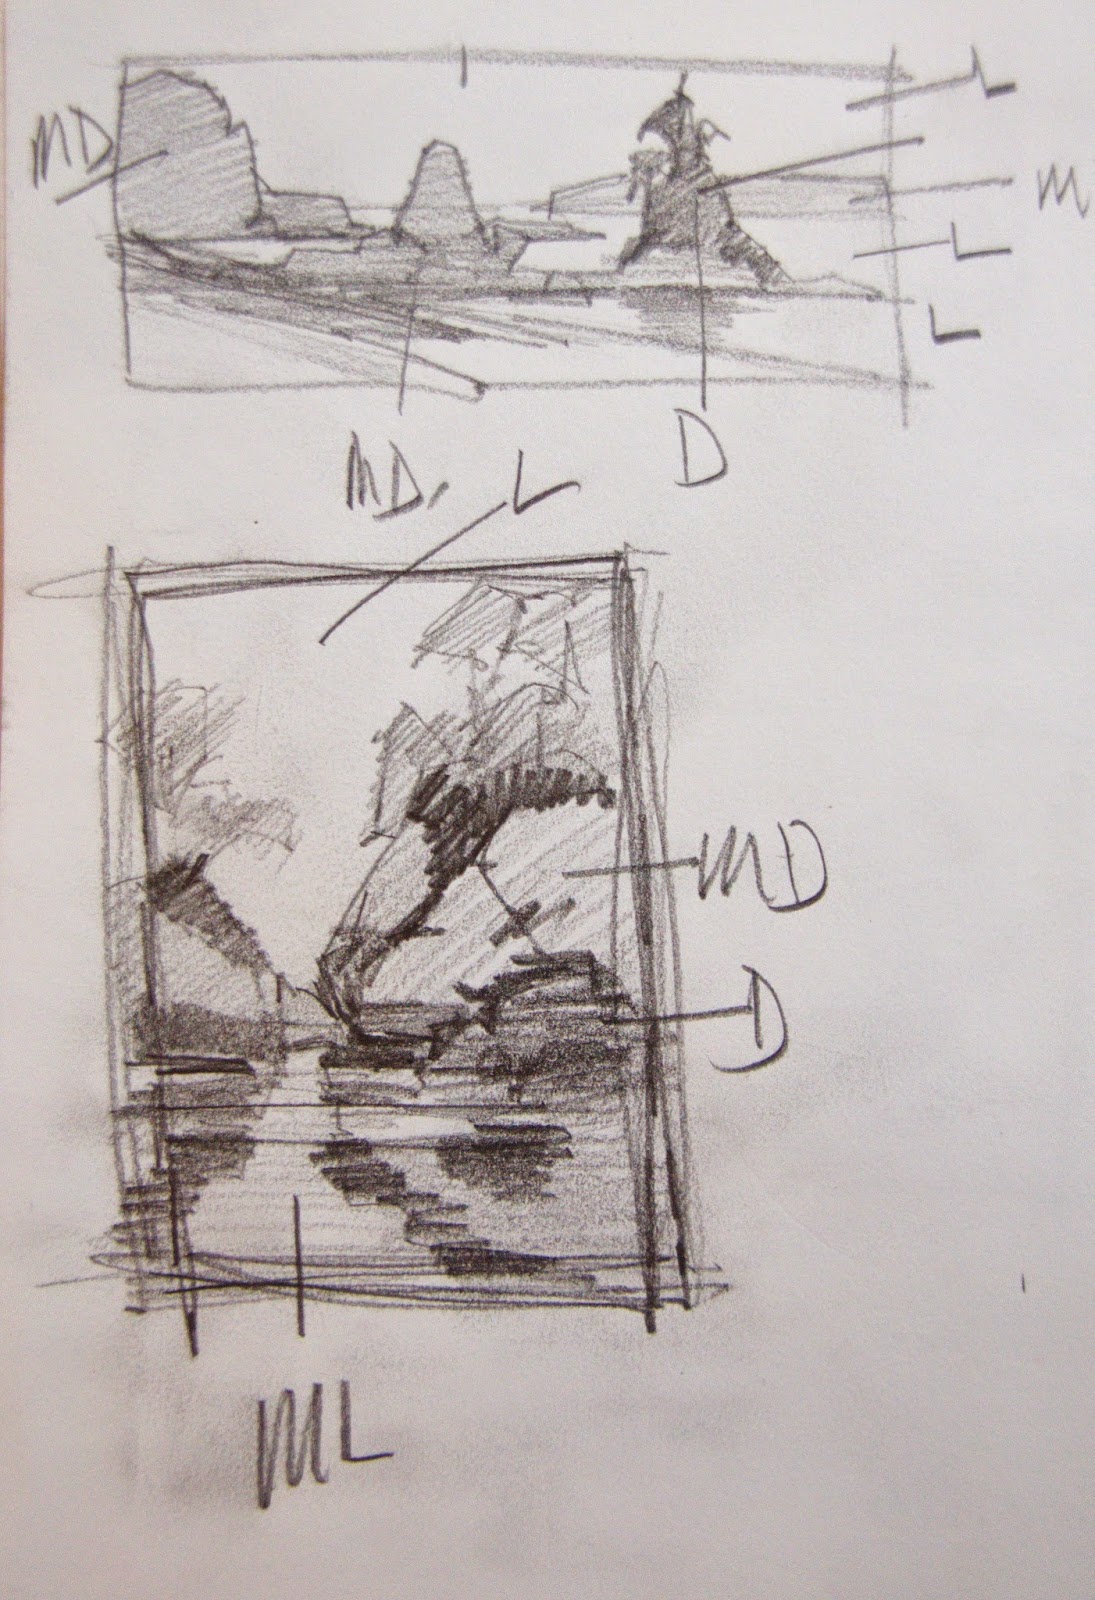
I use them to apply paint and to pick out. I will often slap on spot of thick colour then pick out "twiggs or grassed " -see top image. Apply thick paint in a rock area then shape the rock with the shaper - see the base magenta showing through the purple rocks above .


Maybe hard to understand, but in the above detail shows multiple layers picked out showing the one below. Each MUST BE DRY.   You can see the green-black added over the lighter greens then shapes and the small holes created.  Then the small green tree on the bottom added over the black green tree and the small lines lifted to create the illusion of stems etc. Also those straight lines coming out from the green black are added using the shaper - just gently lifting paint and banging it in place.


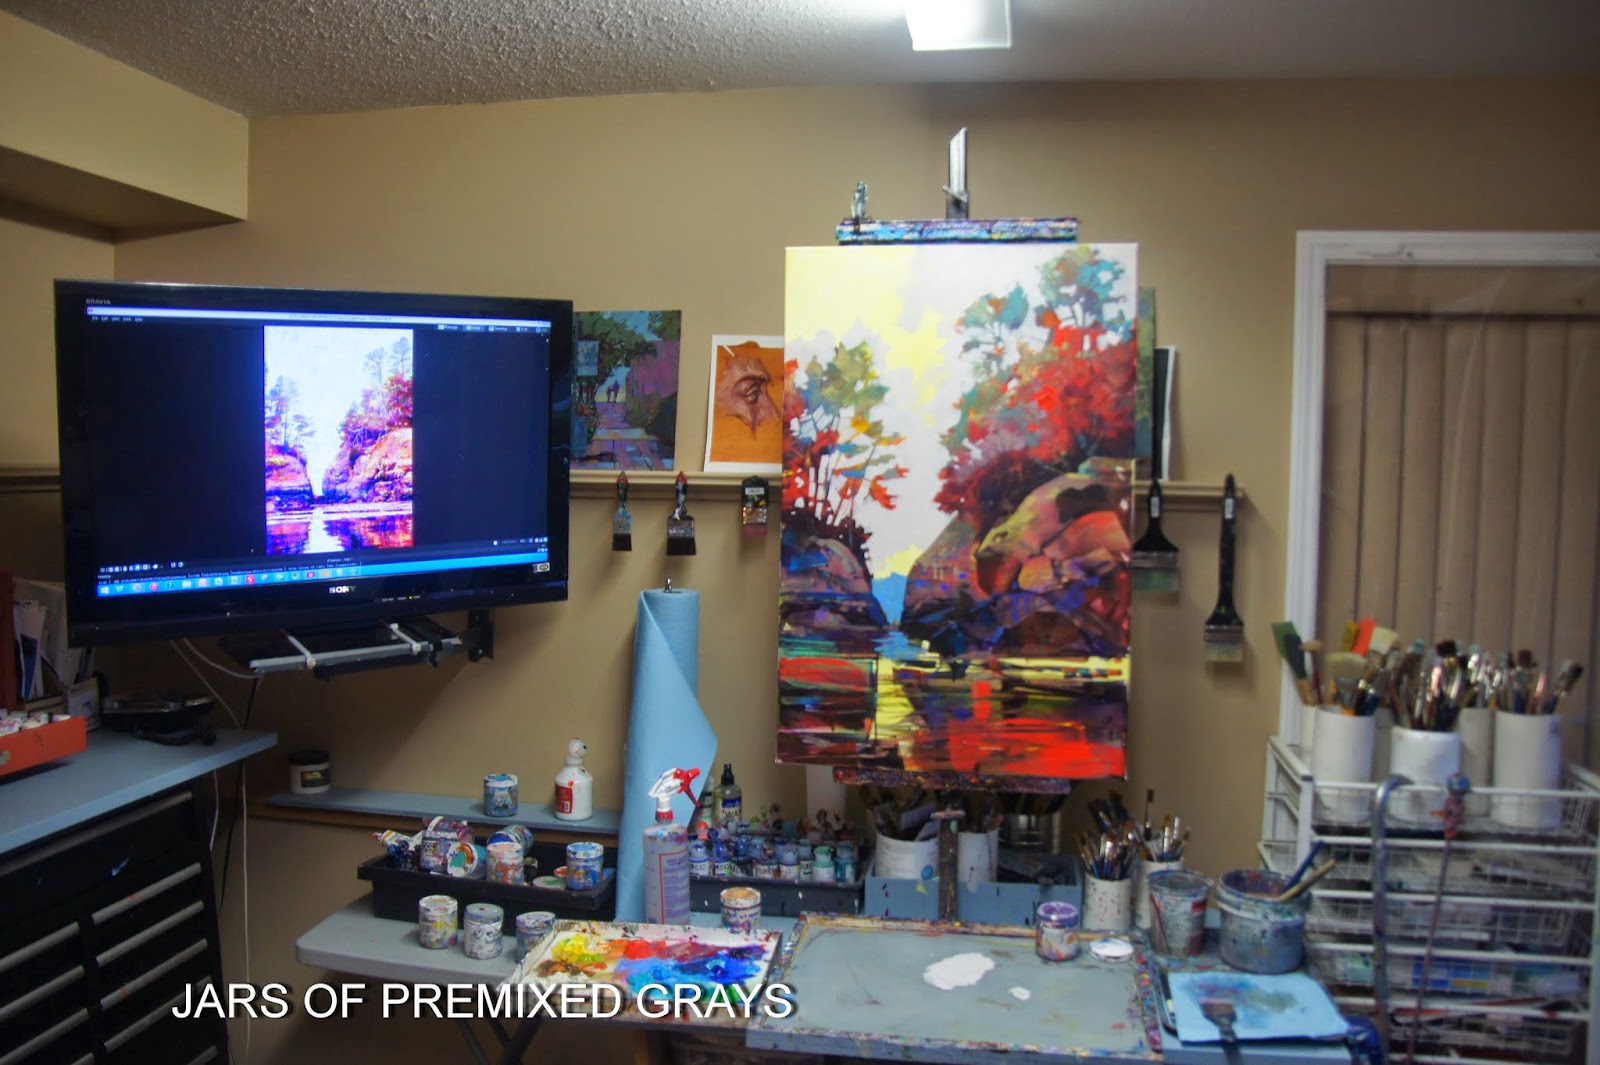
And this above I do a LOT. Creating a value underpainting using transparent liquid acrylic - if you enlarge the image you can see where paint was added with the shaper and where it was lofted off - back and forth, back and forth.

Great for applying sweeping strokes on water and waves.

The shaper MUST be clean - front and sides. Then you get a nice clean stroke.

Where to buy: in Canada Opus, Curies  and most other have or can get. If you are near me on Vancouver Island, Bonnie at  Qualicum Art Supply as brought them in for my workshops. In the US almost all the major suppliers have them. Big range in prices.
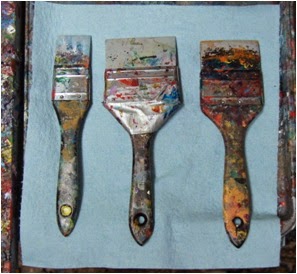
This is what you want!

Most people seem to have these - very limited use.

Princeton has a new line of rigid and malleable tools - useful but not the same. 

Other "found in the kitchen" shapers will not give you the untility  of the commercial ones.  But you probably need to try each to see the difference.

Hope that helps. Got to get to the gym.

Tuesday 4 November 2014

USING A COLOUR SHAPER FOR ACRYLIC BLOCK INS


I don't know how it started but I generally use a colour shaper , from 1 inch to 5 inches, for adding and removing paint during the early block in stage. I have not shown it's use recently so I thought I would share this attempt. I use it with transparent liquid acrylics ( preference for me is Golden) to layer in a value underpainting of either a mono colour or include the colours that will be used in most large shapes as I did with this piece.

There is something about the physicalness of swiping on and removing as needed that gets me into the feeling of the painting. I think it forces  abstraction  and helps me to avoid over-representation in my work. I particularly like using it when I want a degree of randomness and colour and when I will use opaques to carve out shapes negatively - as in the case of the rocks and trees in this piece.

But mostly I just enjoy it- it gets me in the mood and into my painting.

The initial sketch was done using water soluble pencils followed by acrylic markers once I was happy with my plan.
Initial value sketch - pencil on paper  - to light, mid light, mid dark and dark 


Multiple layers of transparents, dark at the base and warmer for the trees

Green gold wash over entire piece

Beginning to shape trees using pre mixed opaque - thinly over yellow underpainting 

Set up
Examples of colour shapers used

Almost finished shaping sky and water


Autumn Passage   Acrylic on Canvas 24x36

So now into a frame and sit with it for a few days to see what it needs.