Pages

GO TO YOUR ROOM !

I borrowed this phrase from the recently deceased Canadian painter Robert Genn who believed that there is only so much we can learn about how to paint from the many fine instructors and resources available today. The true learning comes from going off on our own and just doing it - Go to your room!

I have had the good fortune to take instruction from outstanding artists in Canada and the USA. I continue to work on my own development ( Going to MY room!) . I share, through this blog and workshops, what I have learned and what others have shared with me.

I created this blog primarily for those attending my workshops to keep in touch and to further share as we grow together. If others are interested in following that would be great.

Enjoy the journey.

Wednesday 24 December 2014

My month with the Watts Atelier On-line Courses


If you follow my Facebook page you will know I have been out of commission for the past month. Knee replacement - resulting from an old rugby injury almost 50 years ago.  


So to fill the time I loaded up on new books and prepared to not be painting for the month.  Didn't take long until that got stale.

Recently I had been considering the Watts Atelier on-line courses but felt I did not want the expense or commitment. But then this seemed like a good time and a good way to kill the time. And for a reason I cannot understand I seem to keep needing to play with portraiture and figurative painting every once in a while. So I took a look. 


There are a growing number of on-line learning opportunities. For most you pay by the course or by a monthly fee giving access  to a selection of videos.  The Watts approach is different: $200 per month but with full access to a growing selection of programs each with many courses. Pay extra and you get personal mentoring from one of their excellent instructors - or Jeff himself. Initially that seemed expensive and I hesitated. I wanted to be able to buy a course, download and view at my leisure. But once I took a look and knowing I had an open month ahead of me I decided to register for one month to give it a try. And I was glad I did.  The program is excellent and growing in scope. It is designed as a complete learning experience. If I wanted to it would take me from basic drawing skills through to many different approaches to portraiture and figure painting - all done very well. It is comprehensive. In addition to the excellent videos there are very good pdf notes to download with each section.

I spent 6 months at the Atelier , near San Diego, a number of years ago. It was great but very expensive. This would have been a reasonable alternative.

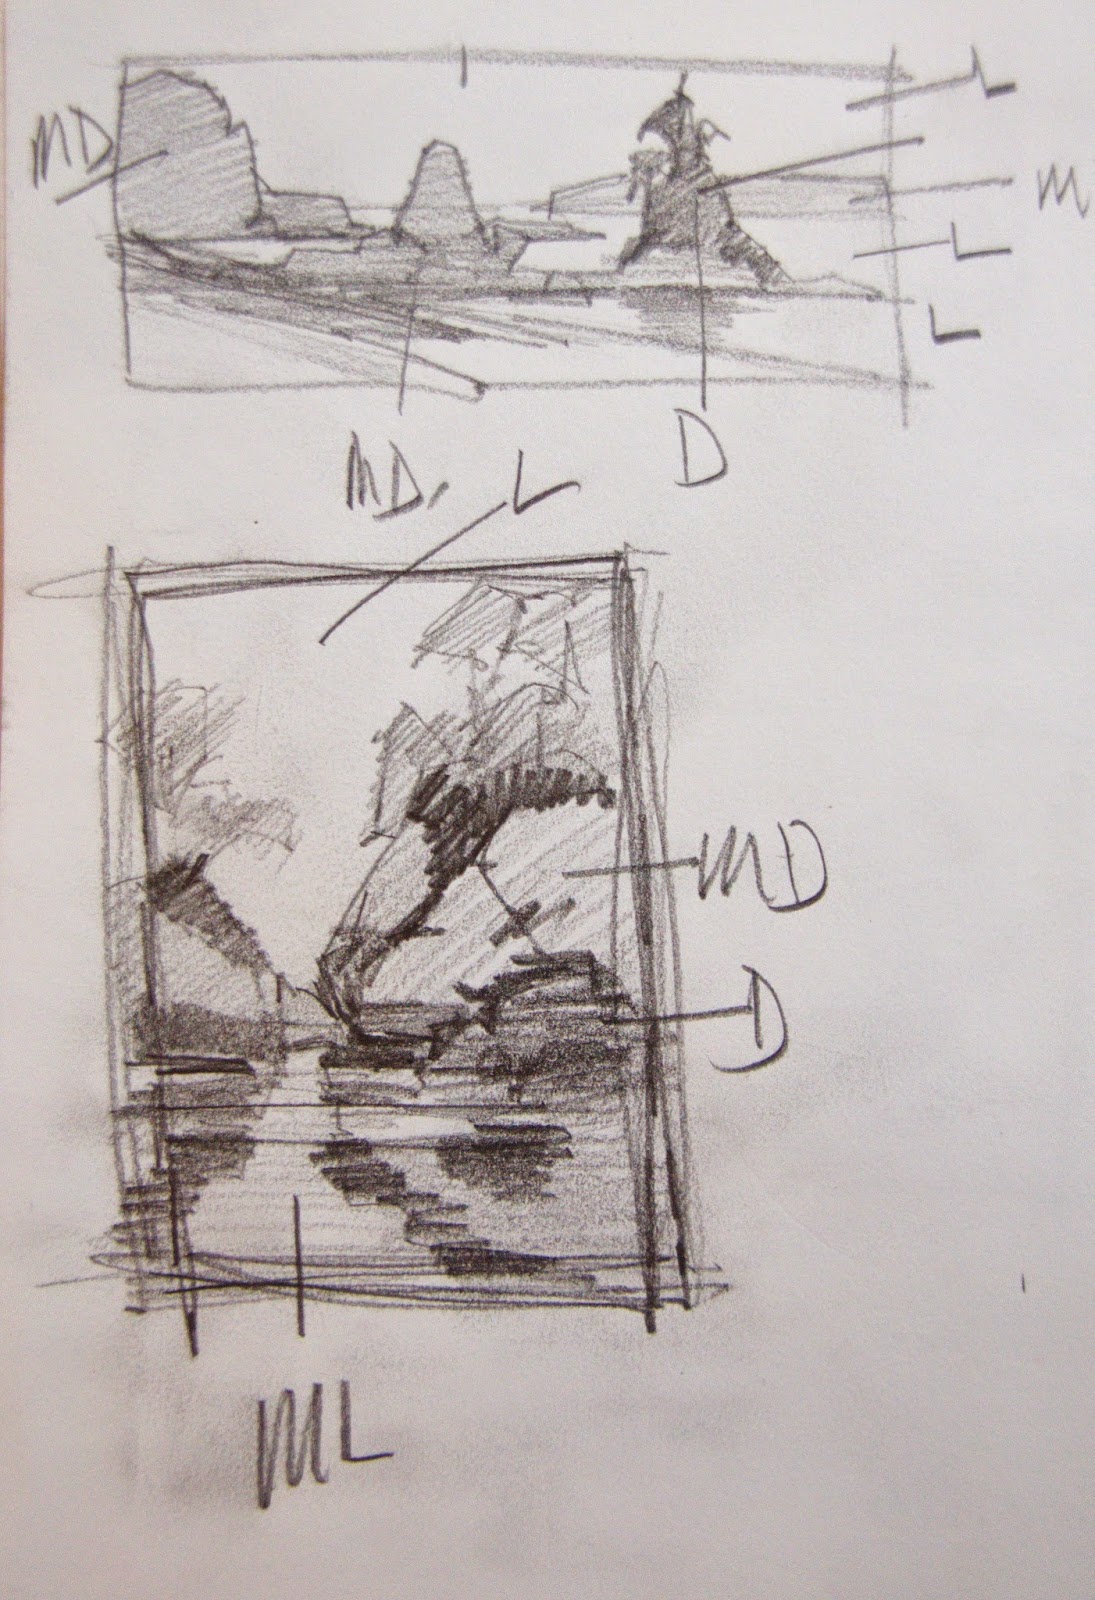
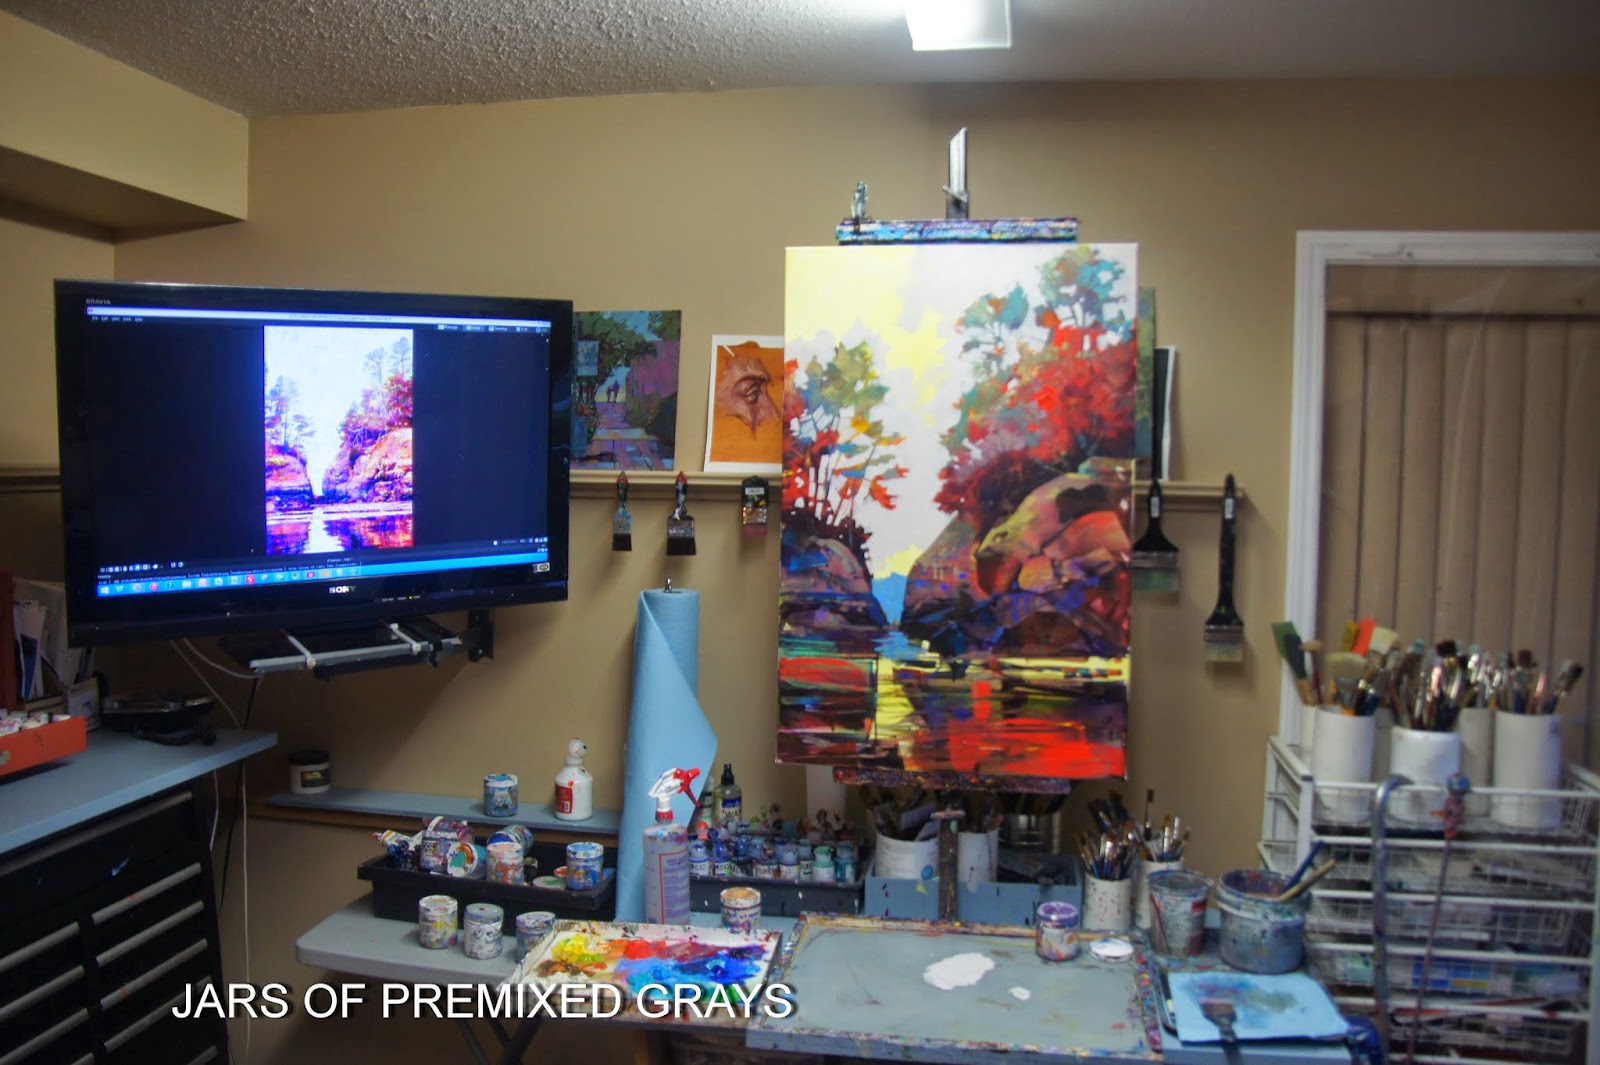
While my initial interest was in playing with portraiture again, the landscape program also impressed me. Jeff Watts dad, Robert has two courses on design, one in particular on Composition and Staging, that are excellent. He is a great teacher - as is Jeff. So I watched and re-watched some of the videos then at week two was able to drag my butt down to the studio. Set up a small oil work space and painted seated (which normally I hate doing) for a few hours each day. And I did as many of the exercises as I could. I re-kindled my love- hate relationship with portraiture. Love to be able to be good at it but hate the commitment it takes. But just the exercises working on tight control, no matter the subject, are good for me - as my landscapes seem be becoming more serendipitous the more I paint.

Excellent quality videos

Portraiture has three phases each with about a dozen courses - and more to come

A few of the courses in Phase II portraiture
Videos show the palette and reference 
Excellent reference material to work with 

pdf notes 

Robert Watts  Composition and Staging course - excellent 

Its been four weeks since my surgery, I am doing well. Most days painting at least 4-5 hours and all of it has been playing with the Watts programs. My interest is in trying to capture a bit of a likeness but more importantly  to make it interesting using colour, brush strokes and texture. I made dozens of exercise 6x8s and a few 8x10. 

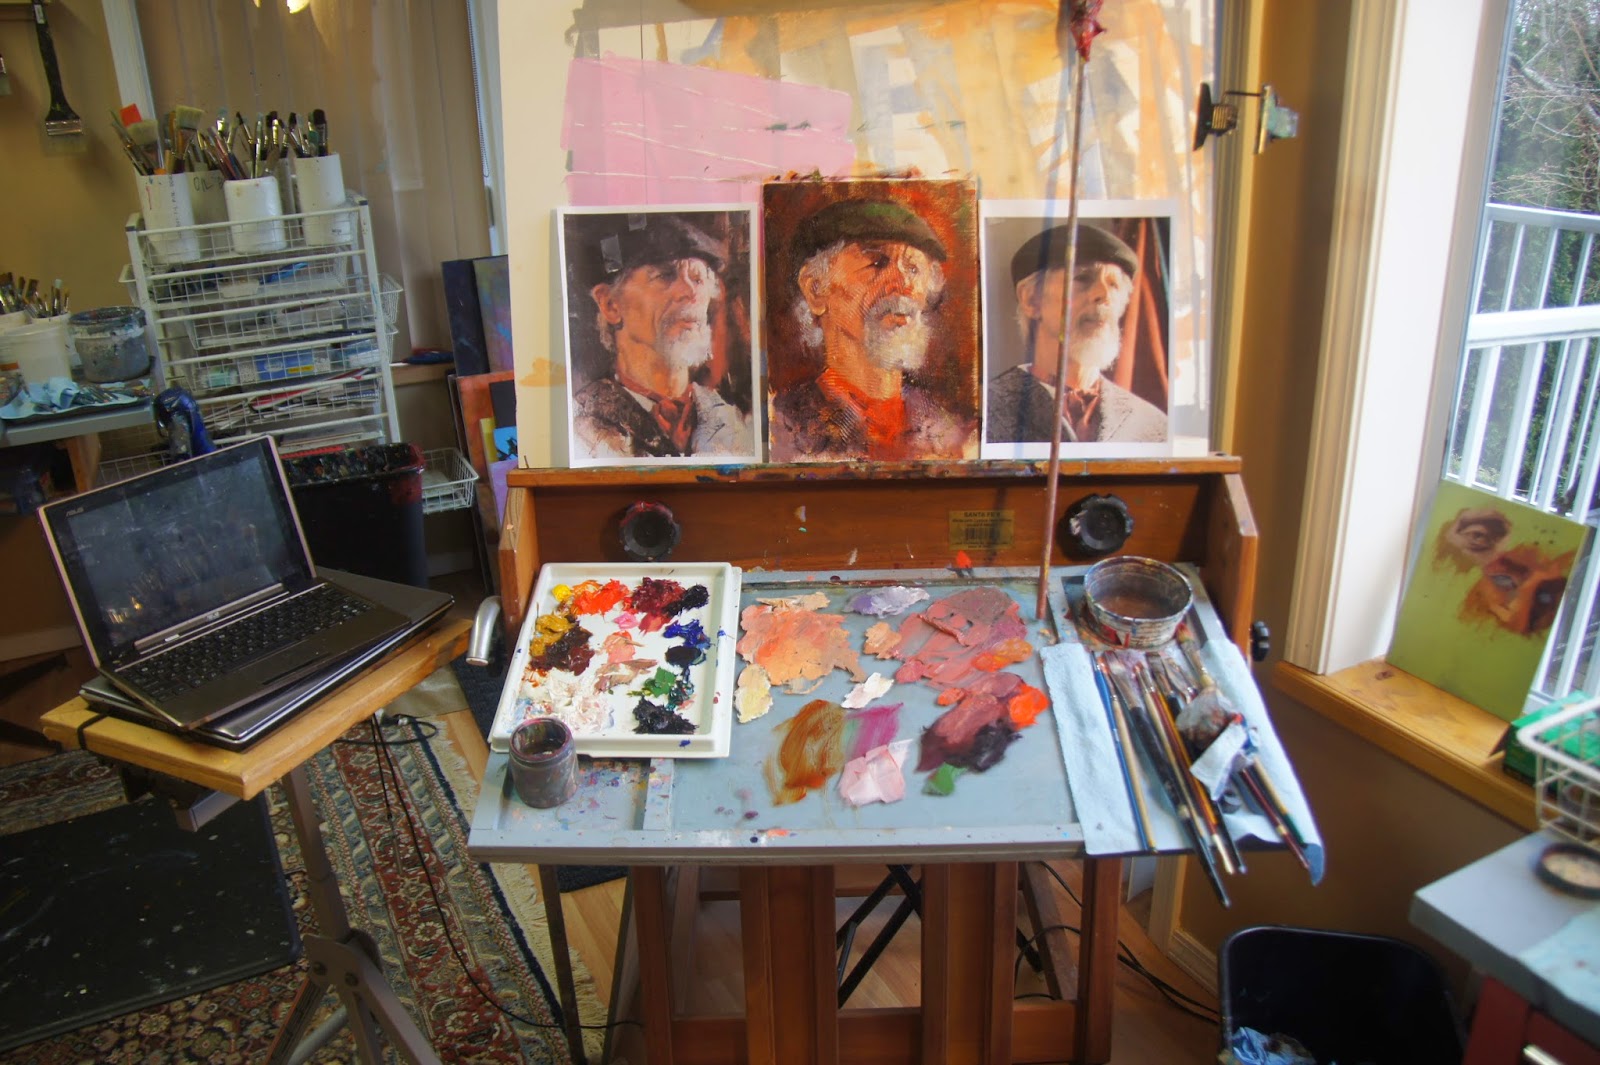
My set up. Videos on left and using printed pdf for reference. 


A few 8x10 examples. Notice the heavy texture on a few done with acrylic molding paste - just playing 

So am I now any closer to being a portrait painter? No, never going to happen. Its something you need to do every day if you are ever going to be good. But I have enjoyed it and it has helped move me forward. 

My plan is to finish this first month, get back to my acrylics, then at some point re join for a month as new courses are added. 

Summary: excellent programs, well planned and taught, quality format, good value. 

Thursday 6 November 2014

MORE ON COLOUR SHAPERS


Thick yellow spot laid on then use shaper to draw out edge and lift out to let underpainting through


Wow, had lot of questions about colour shapers: what are they, where do you get them, can I just use my kitchen spreader????

Colour shapers come in a variety of shapes and sizes. They are rubber - and you can buy rigid (generally black rubber)  or more malleable  (generally mid value gray). The come from fine tipped to a blade up to 5 inches.

My most useful are 2 and 3 inches. These will do everything that the pointy ended ones do and so much more. For me the pointy ones are next to useless in comparison and they cost almost as much.

I use them to apply paint and to pick out. I will often slap on spot of thick colour then pick out "twiggs or grassed " -see top image. Apply thick paint in a rock area then shape the rock with the shaper - see the base magenta showing through the purple rocks above .


Maybe hard to understand, but in the above detail shows multiple layers picked out showing the one below. Each MUST BE DRY.   You can see the green-black added over the lighter greens then shapes and the small holes created.  Then the small green tree on the bottom added over the black green tree and the small lines lifted to create the illusion of stems etc. Also those straight lines coming out from the green black are added using the shaper - just gently lifting paint and banging it in place.


And this above I do a LOT. Creating a value underpainting using transparent liquid acrylic - if you enlarge the image you can see where paint was added with the shaper and where it was lofted off - back and forth, back and forth.

Great for applying sweeping strokes on water and waves.

The shaper MUST be clean - front and sides. Then you get a nice clean stroke.

Where to buy: in Canada Opus, Curies  and most other have or can get. If you are near me on Vancouver Island, Bonnie at  Qualicum Art Supply as brought them in for my workshops. In the US almost all the major suppliers have them. Big range in prices.
This is what you want!

Most people seem to have these - very limited use.

Princeton has a new line of rigid and malleable tools - useful but not the same. 

Other "found in the kitchen" shapers will not give you the untility  of the commercial ones.  But you probably need to try each to see the difference.

Hope that helps. Got to get to the gym.

Tuesday 4 November 2014

USING A COLOUR SHAPER FOR ACRYLIC BLOCK INS


I don't know how it started but I generally use a colour shaper , from 1 inch to 5 inches, for adding and removing paint during the early block in stage. I have not shown it's use recently so I thought I would share this attempt. I use it with transparent liquid acrylics ( preference for me is Golden) to layer in a value underpainting of either a mono colour or include the colours that will be used in most large shapes as I did with this piece.

There is something about the physicalness of swiping on and removing as needed that gets me into the feeling of the painting. I think it forces  abstraction  and helps me to avoid over-representation in my work. I particularly like using it when I want a degree of randomness and colour and when I will use opaques to carve out shapes negatively - as in the case of the rocks and trees in this piece.

But mostly I just enjoy it- it gets me in the mood and into my painting.

The initial sketch was done using water soluble pencils followed by acrylic markers once I was happy with my plan.
Initial value sketch - pencil on paper  - to light, mid light, mid dark and dark 


Multiple layers of transparents, dark at the base and warmer for the trees

Green gold wash over entire piece

Beginning to shape trees using pre mixed opaque - thinly over yellow underpainting 

Set up
Examples of colour shapers used

Almost finished shaping sky and water


Autumn Passage   Acrylic on Canvas 24x36

So now into a frame and sit with it for a few days to see what it needs.

Friday 24 October 2014

New Acrylic Workshop Announced for Campbell River Art Gallery


New acrylic two day workshop to be held March 7/8 at the Campbell River Art Gallery on Vancouver Island. The program is designed for serious beginners to intermediate artists wishing to explore the great potential in the acrylic medium.

Clip from the Campbell River Art Gallery Website. 
We will focus on techniques and equipment useful to acrylic painters, on different approaches to beginning an acrylic painting  and the use of different types of acrylic paints and mediums.

I will be doing demos and a few paint-along-with-me drills. There will be exercises to practice. On the Sunday afternoon participants will work on their own painting employing many of the techniques demonstrated.

Participants will receive my recommended reading list, a supply list and my outline Steps for Making a Landscape Painting. 

To register contact the Campbell River Art Gallery.


Monday 6 October 2014

From plein air sketch to studio commission


Pleased to have been  commissioned to make a  painting in Collingwood. The request was for the view from the top of Blue Mountain down to the town and to the grain silos - the  town icon. Its a scene I have painted many times but only in the spring and winter.

 The client wanted a splash of fall colour and the Collingwood scene from above.


Pencil sketch on linen. Final draw in using acrylic markers

WM oils nearing finish   11x14 on linen
For the commission I decided to create an oil and an acrylic. Each with a different foreground.

Oil on linen 14x18  
Acrylic on linen 14x18
The client chose the oil.  Wonderful couple to work with making doing a commission a joy.


Sunday 7 September 2014

Along the Road to Ontario


In mid August Cathy and I left Comox for Ontario to spend 6 weeks with our family there. We took our RV, headed into Washington State and did the Cascades region, which we had not seen before. Then up into Southern BC and across Canada to Ontario. The trip was easy (for a change), uncomplicated by bad weather or problems of any type.

We really enjoy our 24 ft unit - e bikes on the back.


In Saskatoon we enjoyed the hospitality of painter and photographer Delee Grant and her husband Larry. 
I packed an acrylic kit to use in our rented condo on arrival and an oil kit for plein air along the way. I decided NOT to pack my acrylic plein air kit - to force me to work with the oils and not have my more comfortable acrylics to fall back on when I got frustrated. Goal was to experiment with new and  different brushes on different surfaces - linen or smooth gessoed MDF board. 

I made about 20 small pieces along the way, all needing "tweeking".  Below I have shared a few. 


 I am pleased to have been asked to do a workshop with the Marsh Street Painters in Clarsburg while I am here. Looking forward to that.

Will try to keep in touch - grand-kids permitting.